...
Change PSK key file owner and group to ‘uptimeagent’, for example:
Code Block chown uptimeagent /opt/uptime-agent/conf/psk.txt chgrp uptimeagent /opt/uptime-agent/conf/psk.txt
The following is an example of Stunnel configuration for the PSK support:
Code Block exec = /opt/uptime-agent/bin/uptimeagent options = NO_SSLv2 options = NO_SSLv3 options = NO_TLSv1 options = NO_TLSv1.1 ciphers=PSK PSKsecrets=/opt/uptime-agent/conf/psk.txt PSKidentity=test1
Code Block Example of content of /opt/uptime-agent/conf/psk.txt: test1:qqtest11qqtest11qqtest11
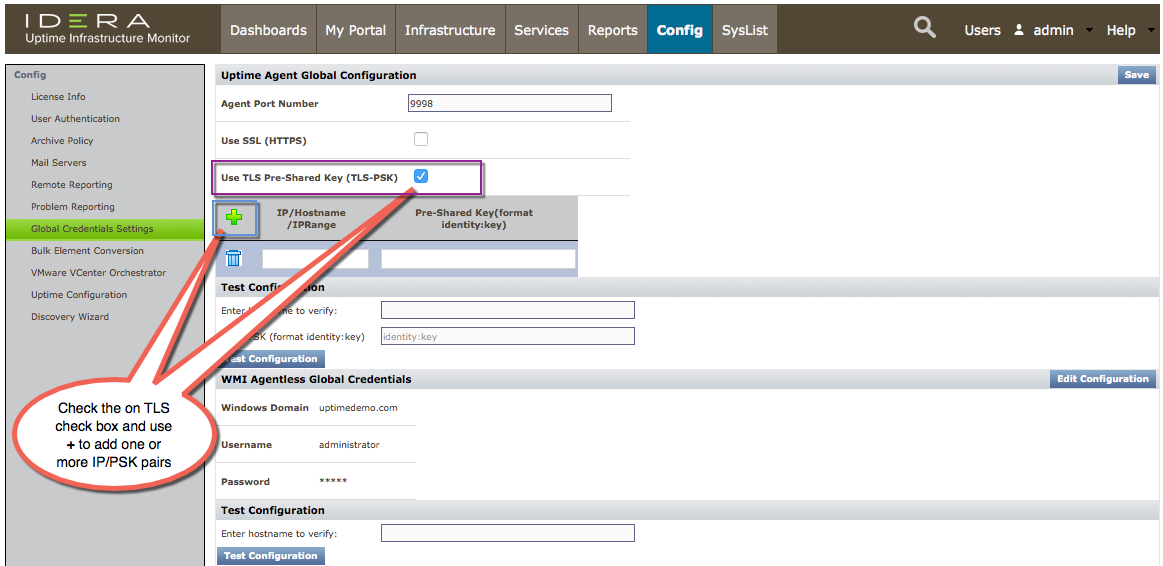
When adding Agents to the Monitoring Station, be sure to select Use SSL, Use TLS-PSK and specify PSK identity/key or enable corresponding options on the Global Credentials Settings page. On the Global Credentials Settings page, configure the list of PSK identities and keys for specific IP addresses or IP ranges. These identities and keys will be used when the Use Uptime Agent Global Configuration option is selected.
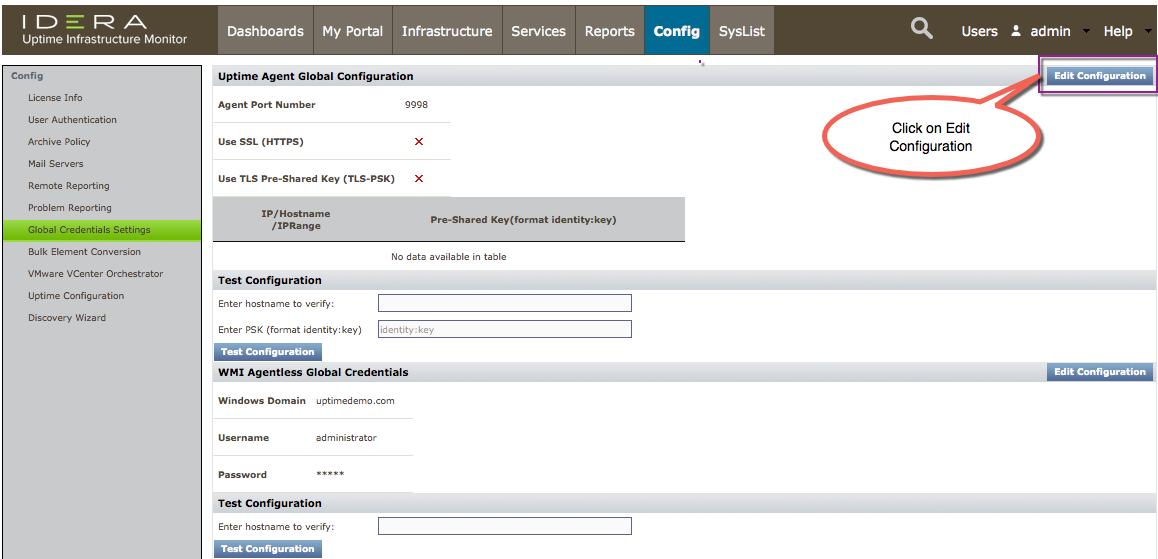
To edit existing Agent configuration, click Config > Global Credentials Settings, and then click Edit Configuration, as shown in the following image.
For the PSK, in the IP/Hostname/IPRange field, indicate which Hostnames or IP address ranges to specify using one of the following formats:- a single subnet (e.g., 10.1.50)
- multiple, comma-separated subnet entries (e.g., 10.1.50, 10.1.51, 10.1.52)
- an IP address range (e.g., 10.1.53.65-120)
- multiple subnets and an IP address range (e.g., 10.1.50, 10.1.51, 10.1.52, 10.1.53.65-120)
You may provide ranges only for address, but not subnets. Subnet ranges should be entered as a comma-separated series, as described above.