...
- Click Infrastructure.
- Click the Hyper-V Server's gear icon, then in the pop-up menu, click Graph Performance. Whenever you take this action with an Element, you are taken to its Quick Snapshot.
Whenever you graph the performance of an Element from the Infrastructure view, its Quick Snapshot is displayed. What exactly is shown depends on the type of Element, which we see throughout this part of the Getting Started Guide. In this case, the Hyper-V Server's Quick Snapshot shows information that is directly pulled from the Hyper-V Server metrics:
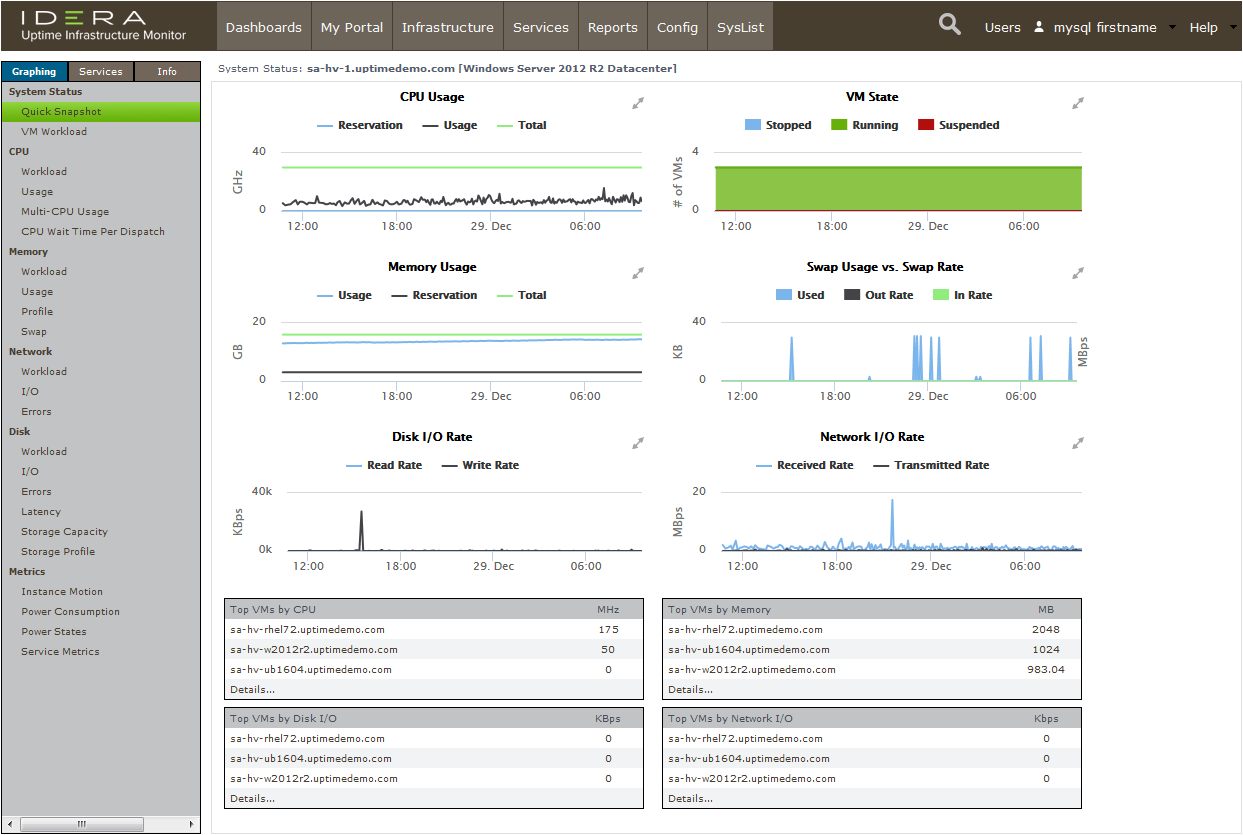
You can incorporate these basic metrics into your Uptime Infrastructure Monitor monitoring plans (such as alerts or reporting). It's more likely, however, that your interest is with the virtual machines that are a part of the vCenter Hyper-V Server inventory. - Click Infrastructure to return to the main inventory view.
- Expand the Discovered Virtual Machines Infrastructure Group, and click the gear icon for any of the VMs. In the pop-up menu, again, click Graph Performance to display that Element's Quick Snapshot. This displays metrics for the VM that are pulled from the vCenter Hyper-V Server's metrics:
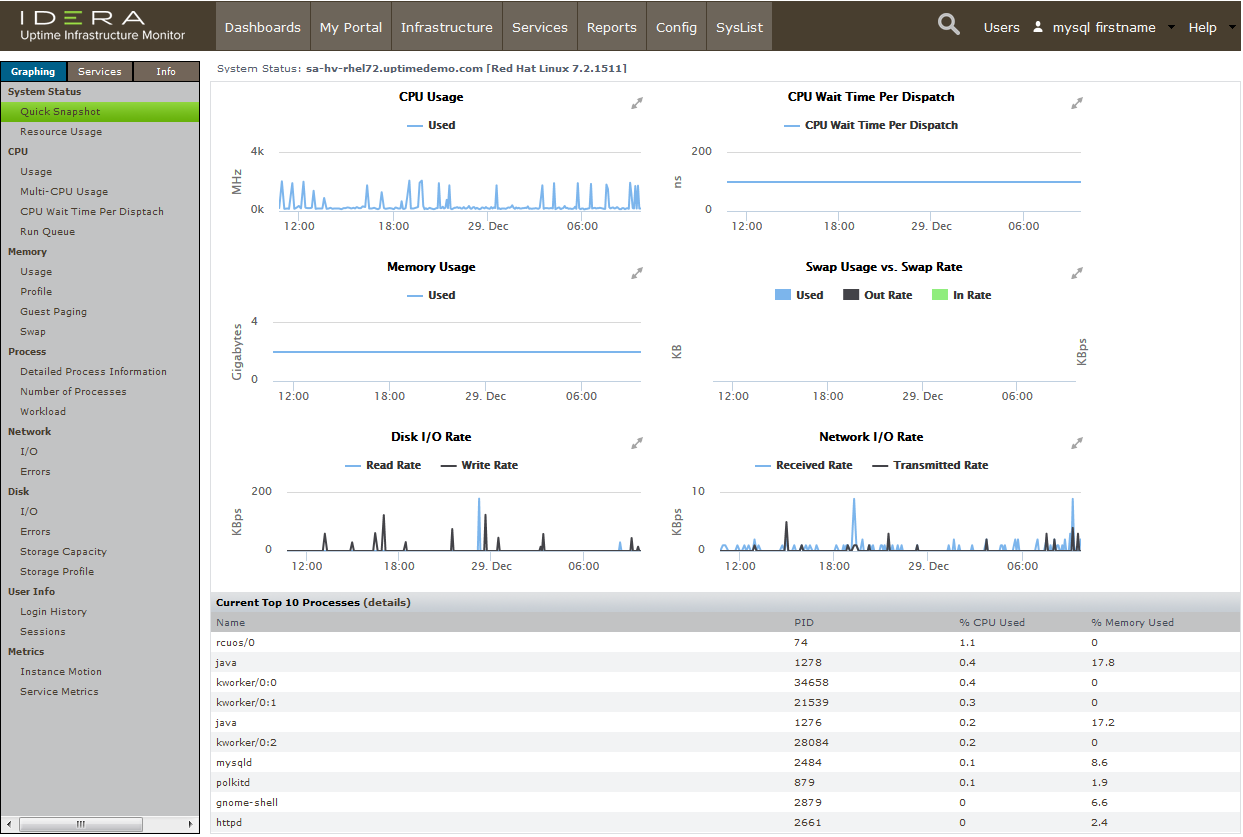
As with the vCenter Hyper-V Server Element's metrics, you can incorporate these into your alerts and reports. However, this "basic VM" view allows you to work only with what the vCenter Hyper-V Server provides; there may be cases where you want to add a little extra "Uptime Infrastructure Monitor power," and install an Uptime Infrastructure Monitor agent on the VM. This is something you learn a bit more about in the next module.
| Note | ||
|---|---|---|
| ||
In this module, if the inventory imported from vCenter Hyper-V Server exceeds open slots in your license, some of the inventory is ignored, and you have no space left to add Elements to your monitored inventory. In the next two tracks In this Getting Started Guide, you are adding servers and network devices. If you plan on following either or both of these tracks, you need to anticipate the number of servers and network devices you add. To follow the server track, you'll need at least 2; to follow the network device track, you'll need at least 1. The easiest way to free up space is to manually ignore VMs; each VM you ignore opens a license spot for a new Element. Return to the Inventory Detail view for the vCenter (Infrastructure > gear icon > View > Inventory Detail). Select VMs, ESX hosts, or even an entire cluster, then click Add Selected Elements to Ignore. The spots are freed up in your license, which you can verify by clicking Config > License Info. Alternatively, you can also contact your Uptime Sales representative at [email protected] to look into increasing the size of your license. |
...
| Section | ||||||||||
|---|---|---|---|---|---|---|---|---|---|---|
| ||||||||||
|