...
- In the Uptime Infrastructure Monitor Web interface, begin by clicking Config, then clicking Global Element Settings in the left pane. As you did with agent- and WMI-based servers in the previous track, you can create a common definition that many or all of your SNMP devices use, allowing you to auto discover large groups that share the same properties.
- In the SNMP Global Credentials section, click Edit Configuration:
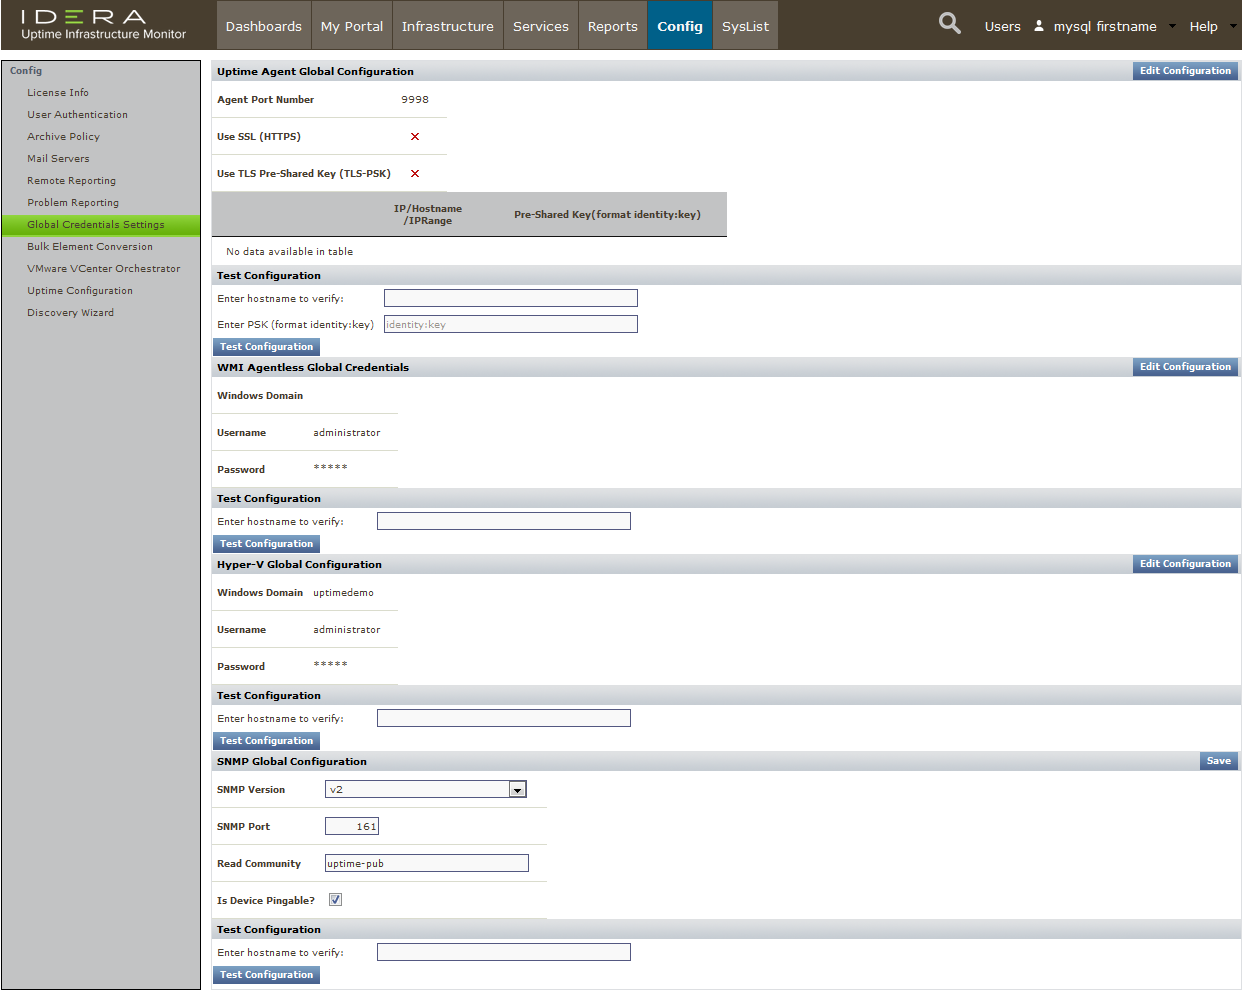
- Select the SNMP Version for this common SNMP definition.
- Configure the settings similar to those shown above:
- SNMP Port: The port on which the network device is listening.
- Username: (v3) The name that is required to connect to the network device.
- Authentication Password: (v3) The password that is required to connect to the network device.
- Authentication Method: (v3, optional) From the list, select an option that will determine how encrypted information traveling between the network device and Uptime Infrastructure Monitor will be authenticated.
- Privacy Password: (v3) The password that will be used to encrypt information traveling between the network device and Uptime Infrastructure Monitor.
- Privacy Type: (v3, optional) From the list, select an option that will determine how information traveling between the network device and Uptime Infrastructure Monitor will be encrypted.
- Read Community: (v1 and v2) A string that acts like a user ID or password, giving you access to the network device instance.
- Click Save.
...
Add a Network Device Using Auto Discovery
- Click My Click Infrastructure, then click Auto Discovery in the left pane.
- In the Auto Discovery pop-up, confirm that you want to Discover Servers and Network Devices on Your Network, and then click Next.
- In the next step, select Network Devices with SNMP, and ensure the Use Global SNMP Connection Configuration check box you defined in the previous exercise is selected.
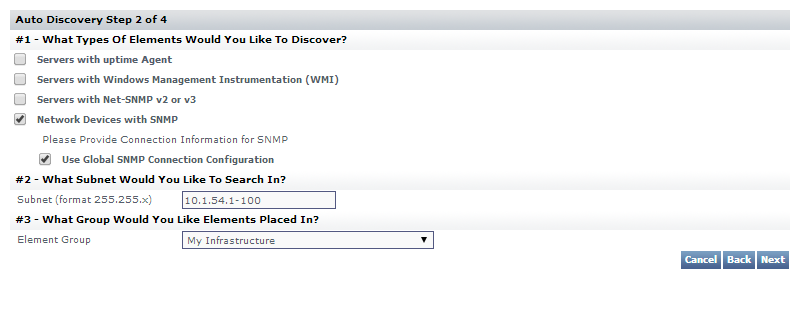
Enter the subnet or an IP address range, similar to above.
Info title Pro Tip Although we are keeping things simple, and using a single subnet or IP address range as shown above, there are other ways to point Uptime Infrastructure Monitor at subnets and subnet ranges to expedite the Auto-Discovery process. See Using Auto Discovery for more information.
- Click Next to start the Auto Discovery process.
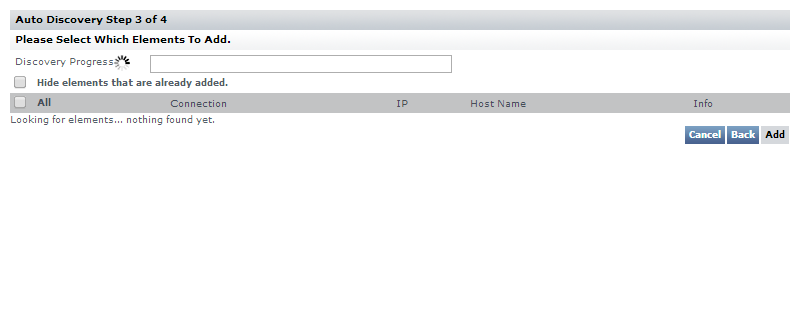
- When all network devices on the subnet or subnet range are detected, you are able to make selections to add to your Uptime Infrastructure Monitor inventory. Select an SNMP device, similar to below:
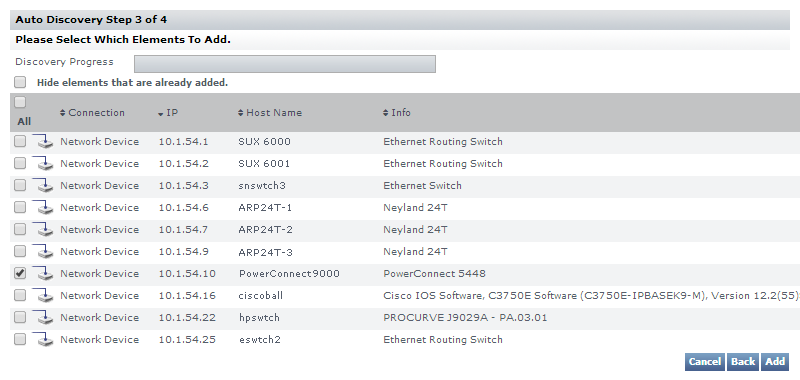
- Scroll to the bottom of the Auto Discovery list, and click Add. As a final step, you will receive confirmation that the network device is now part of your monitored inventory.
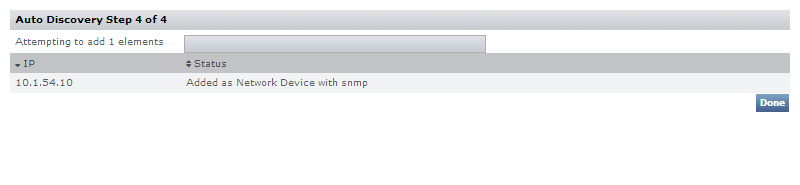
- Click Done.
...
After adding the network device and closing the Auto Discovery window in the previous exercise, the main Uptime Infrastructure Monitor browser window is at the My the Infrastructure view. Refresh the page (or click My click Infrastructure) to ensure the latest additions appear immediately: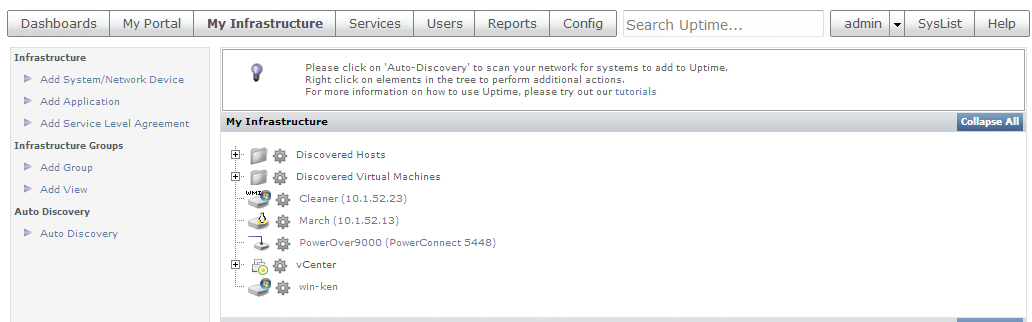
If you followed the exercises that comprised the vCenter Server track and physical server track, your inventory already includes a vCenter Server Element (along with its Infrastructure Groups), as well as an agent-based Linux server, and WMI-based Windows server. In addition, you will now see the network device you added in the previous exercise. Your inventory is now a mix of virtual and physical servers on different platforms, and network devices. Also note the platform-specific icons beside each Element type.
...
| Section | ||||||||||
|---|---|---|---|---|---|---|---|---|---|---|
| ||||||||||
|